When installing LEDs, you may have many different questions. What tools should you use? What are the best ways to measure and cut the LED strip? How do you make sure that all LEDs are installed in the same direction? What are the benefits and disadvantages of wiring in series versus parallel? These questions and more will help you choose the best type of wiring for your LED lighting project.
Tools
If you’re planning to use wire to board connectors when installing LEDs, you should have a few essential tools. A good pair of wire strippers is important to ensure that your wires are cut to specific lengths. A phillips or mini flathead screwdriver is also needed, although some products might require a normal size. A voltage tester can help you troubleshoot electronic connections and determine if there’s any drop or continuity in the system.
Several types of electrical connectors are available, including those that are waterproof and for automotive use. However, if you’re not entirely sure which type to purchase, it’s a good idea to check with a licensed electrician or a professional before buying one. Some connectors require a crimping tool and pliers while others don’t require these tools at all.
Depending on your skill level, you might need a wire cutter to install LED strips. If you’re working with strip lights, you’ll need a pair of scissors that can cut LEDs to the proper length. Additionally, you’ll need to measure the length and width of the LED strips before you begin the installation. By measuring properly, you’ll have a much easier time in the future.
Measurement
Before installing LEDs, it’s essential to properly measure the length of the light wires and their connections to the board. Using wire-to-board connectors is an effective way to measure the length of the LEDs. To find the right length of LED strips, measure the distance from the nearest electrical outlet to the light fixture. Then, buy a longer lighting wire or extension cord to reach the light fixtures. You can purchase LED strips at lighting fixture retailers, home improvement centers, and online. You can also wire more than one strip to one power source.
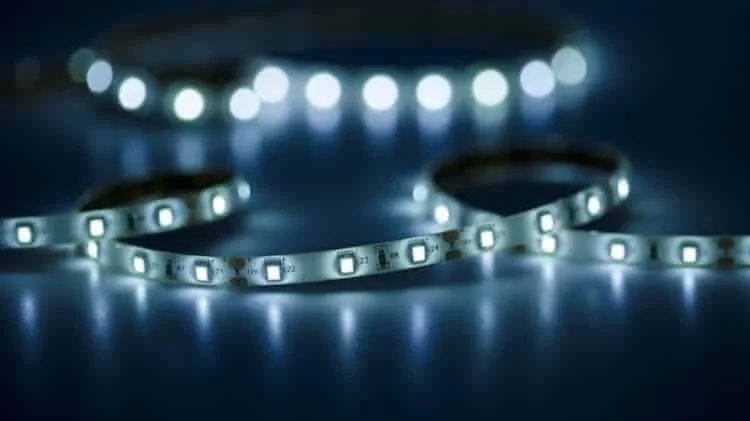
Cutting of LED strip
Before you begin wiring LED lighting, be sure to use the proper wire connectors. Even a skilled electrician can make mistakes when wiring LED lights. Make sure the wires are not obstructed and are making contact with the proper ports. Avoid crossing wires as this can result in an electrical shock or even damage the product. Follow these simple tips for proper connection. If you have any doubts, consult an electrician or use a multimeter to confirm polarity.
Solderless connectors connect wire to board by making a contact with the copper pads on the strip. Unlike the traditional soldering technique, this method is easier and permanent. You don’t have to worry about accidentally breaking the connections. Moreover, solderless connectors have a latch to release the LED strip from the connector. To install LEDs, follow these instructions. They’re easy and quick.
Negative and Positive Patterns
When installing LEDs, it’s important to remember the Negative and Positive Patterns of wire to boards connectors. These are the wires you’ll connect to the board and power supply. The positive and negative wires have different colors. It’s also important to note the color of the copper pads on the LED strips. Using the correct color for your LED strips will help you avoid problems.
When installing LEDs, it’s important to remember the negative and positive electrodes on each LED. The positive electrode will be connected to the positive end of the board, while the negative electrode will connect to the negative side. You can determine the length of each wire by dividing the number of LEDs by the total output of the driver. If you have several LEDs, you’ll want to install them parallel to avoid tangling them up.
To determine the power supply for LEDs, you’ll need to understand the various circuits and their power requirements. There are two basic ways to wire LEDs: in series or parallel. Wiring in series will distribute the total power supply between LEDs. The negative electrode will drain the power supply faster. In parallel wiring, however, you’ll need to use the same power specification as your LEDs. However, this method will not work when you’re installing LEDs with different types of light sources.
Wire to Board Connectors
When it comes to wire to board connectors for LEDs, you have several options. For example, the W + P connector is an excellent choice for flexible lengths. This type of connector offers a flexible angle and is especially useful when you need to avoid any shadowing. You can find these connectors at any hardware store and choose the best one for your application. Regardless of your choice, you’ll be glad you chose this product.
The wires you choose should be waterproof, allowing you to avoid potential electrical problems. It’s important to check the positive and negative ports on your wires before you connect them, to avoid any problems in the future. You can also choose from DIY kits or a professional installation service. When purchasing wire to board connectors, remember to follow the instructions on the package. They should be easy to install, even if you don’t know much about wiring.
Wire to Board and LED Strip Connection
To install an LED strip light, you must first know how to wire it to the board. LED strips come in two types – solderless and traditional. Soldering is the most common method of electrical connection between LED strips and the board. Soldering is not difficult to do, but you should have the right tools for the job. When done correctly, soldering creates a strong electrical connection between the board and the LED strip.
The first step to connect an LED strip to the board is to cut it at the center of the exposed pads. You should use a diagonal cutter for this process. If your LED strip comes in a sealed plastic tube, you may have to cut the silicone tube to remove it. The second step in wiring an LED strip is to braid the wires. To braid them, simply twist them counterclockwise with both hands to ensure that the glue makes good contact. For the wires, use green and red wires.
Ensure that your LED strip is plugged into the correct power source. For instance, a 5v strip will use a DC power supply and can sustain up to 15A. A 12v strip will have up to 180w, so you can use it for more powerful projects. Make sure your wires are thick enough to carry the current. Thinner wires may be fine if you only need to connect a few LEDs.
Tray and LED Strip Light Security
Wire to Board Connectors for Trayer and LED Strip Light Security have two sides: one is the positive and the other is the negative. In order to properly connect the two, you should be sure to place the connector so the positive side is facing upwards. Make sure the connector is securely closed and don’t pull it too hard or you will end up damaging the connector. When installing the wire to board connector, make sure to gently push the strips into place.
Solderless connectors make installation of LED strip lights easy and eliminate the need for a soldering iron. However, soldering is the best way to ensure a strong, long-lasting connection. If you don’t have the time or the tools to solder, solderless connectors can make the process easy. Make sure to remove the 3M backing tape before installing the connectors.
LED Strip Light and Power Connection
Besides the light, another important accessory for LED lights is the LED strip connector. LED tape light connectors are designed to attach the LED strip to the power supply and board. These connectors can be used on both ends of the strip. The connectors are also soldered, but you may find them easier to install if you buy a wire-to-board connector. In addition, you will save time and money by eliminating the need for soldering.
One of the most important things to remember when choosing a power supply for an LED strip is the voltage of the power source. Make sure you purchase one that has the same voltage as the LED strip. Otherwise, you may end up with under or over-voltage. Also, make sure that the power supply can support the entire length of the LED strip. The length of the LED strip can help you determine how much power it will need.ASUS FX503 Laptop Review
Get More Information:
- personal injury attorney san fransisco dolan law | timesways
- Oracle vs Salesforce: What Are the Differences?
- What is myhr kp.org | Basic guideline for myhr kp.org
- sims 3 no channontec outlaw se fix mod | Sims 3 Photography Skill Guide
- Lola Iolani Momoa | Daughter of two celebrities
- baltimore personal injury lawyer rafaellaw.com
- Personal injury attorney memphis beyourvoice.com
- chicago truck accident lawyer chicagoaccidentattorney.net
- Nakoa Wolf Manakauapo Namakaeha Momoa